This is the fourth article in a series describing how I make international bestsellers. This time we will be discussing production.
Article 1: How to make an international bestseller
Article 2: The four main activities in becoming a bestseller
Article 3: Idea and creation
What does production include?
In the production of the book I have included the following activities:
- 1. Cover
- 2. Illustrations
- 3. Pagination and layout
- 4. Printing
- 5. Conversion to digital formats
- 6. Recording and production of the audiobook
The cover
Which role does the cover of a textbook play?
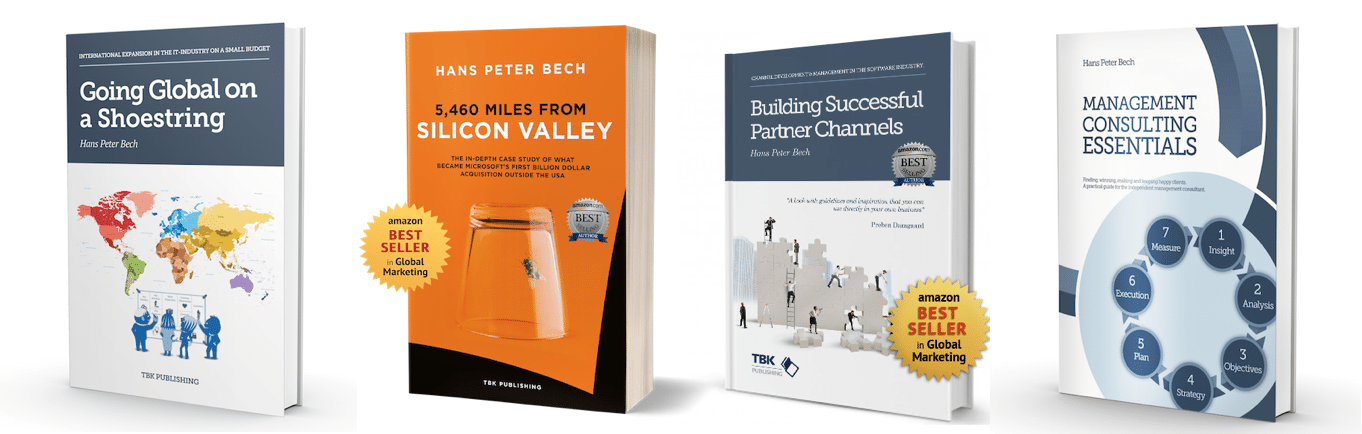
Very few of my books are discovered by potential readers browsing their way through the bookstore’s shelves of business literature. The cover is not meant to catch the reader’s attention in this situation. Most readers become aware of my books through recommendations from Amazon, by getting a tip from another reader, by reading one of my articles or other posts on social media. Then they go online or to a bookstore and order the books.
I do not consider the cover itself to be important. If the reader can recognize the book immediately and relate it to her situation, then it has achieved its objective. The cover should match the book’s genre and title and I believe that my graphic designers have achieved that.
Jelena Galkina, a freelance graphic designer from Tallinn, with whom I have collaborated for more than five years, is responsible for the graphic layout for my English books. It was my previous graphic designer who suggested the simple, recognizable, and slightly textbook-like layout for Building Successful Partner Channels. We have reused the design for Going Global on a Shoestring and we will also use it in my future projects.
The cover of my books differs markedly from other business books. Since I am writing the books for the same target audience and they make a kind of series, we aim for the recognizable.
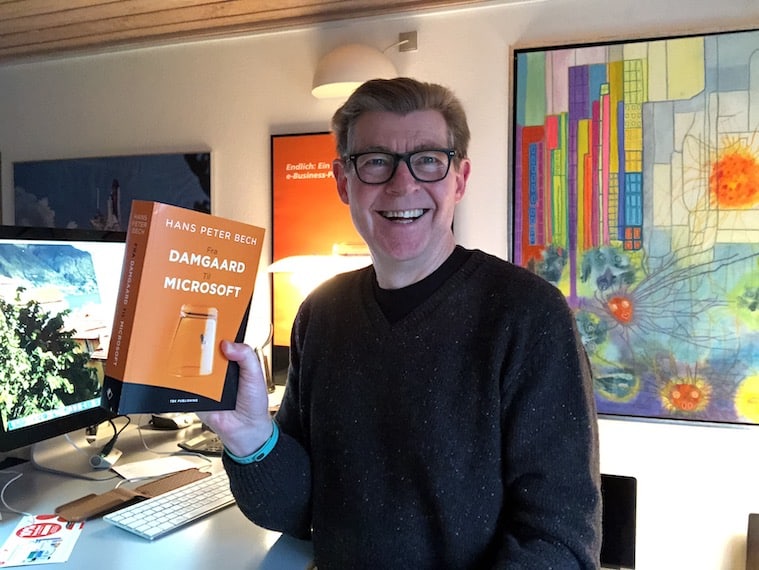
The book From Damgaard to Microsoft – in English 5,460 Miles from Silicon Valley – was a completely different project, which initially aimed primarily at the Danish market. I worked exclusively with Danish graphic designers, editors, and proofreaders. You can find the names of all of them in the book’s colophon, which you will find here. This series of articles is not about the Damgaard book, which I will deal with separately later.
The print version of my books is in the standard dimensions six times nine inches (152.4 x 228.6 mm). The thickness depends on the number of pages and the type of paper used for printing. Amazon-KDP, IngramSpark, and LaserTryk, which are the printing companies I use, have guides to calculate the dimensions of the cover, including the width of the spine. My cover design requires the print file to be very accurate, as the border of the white area on the front is in the fold of the spine.
In the following, I will review the individual parts of the cover.
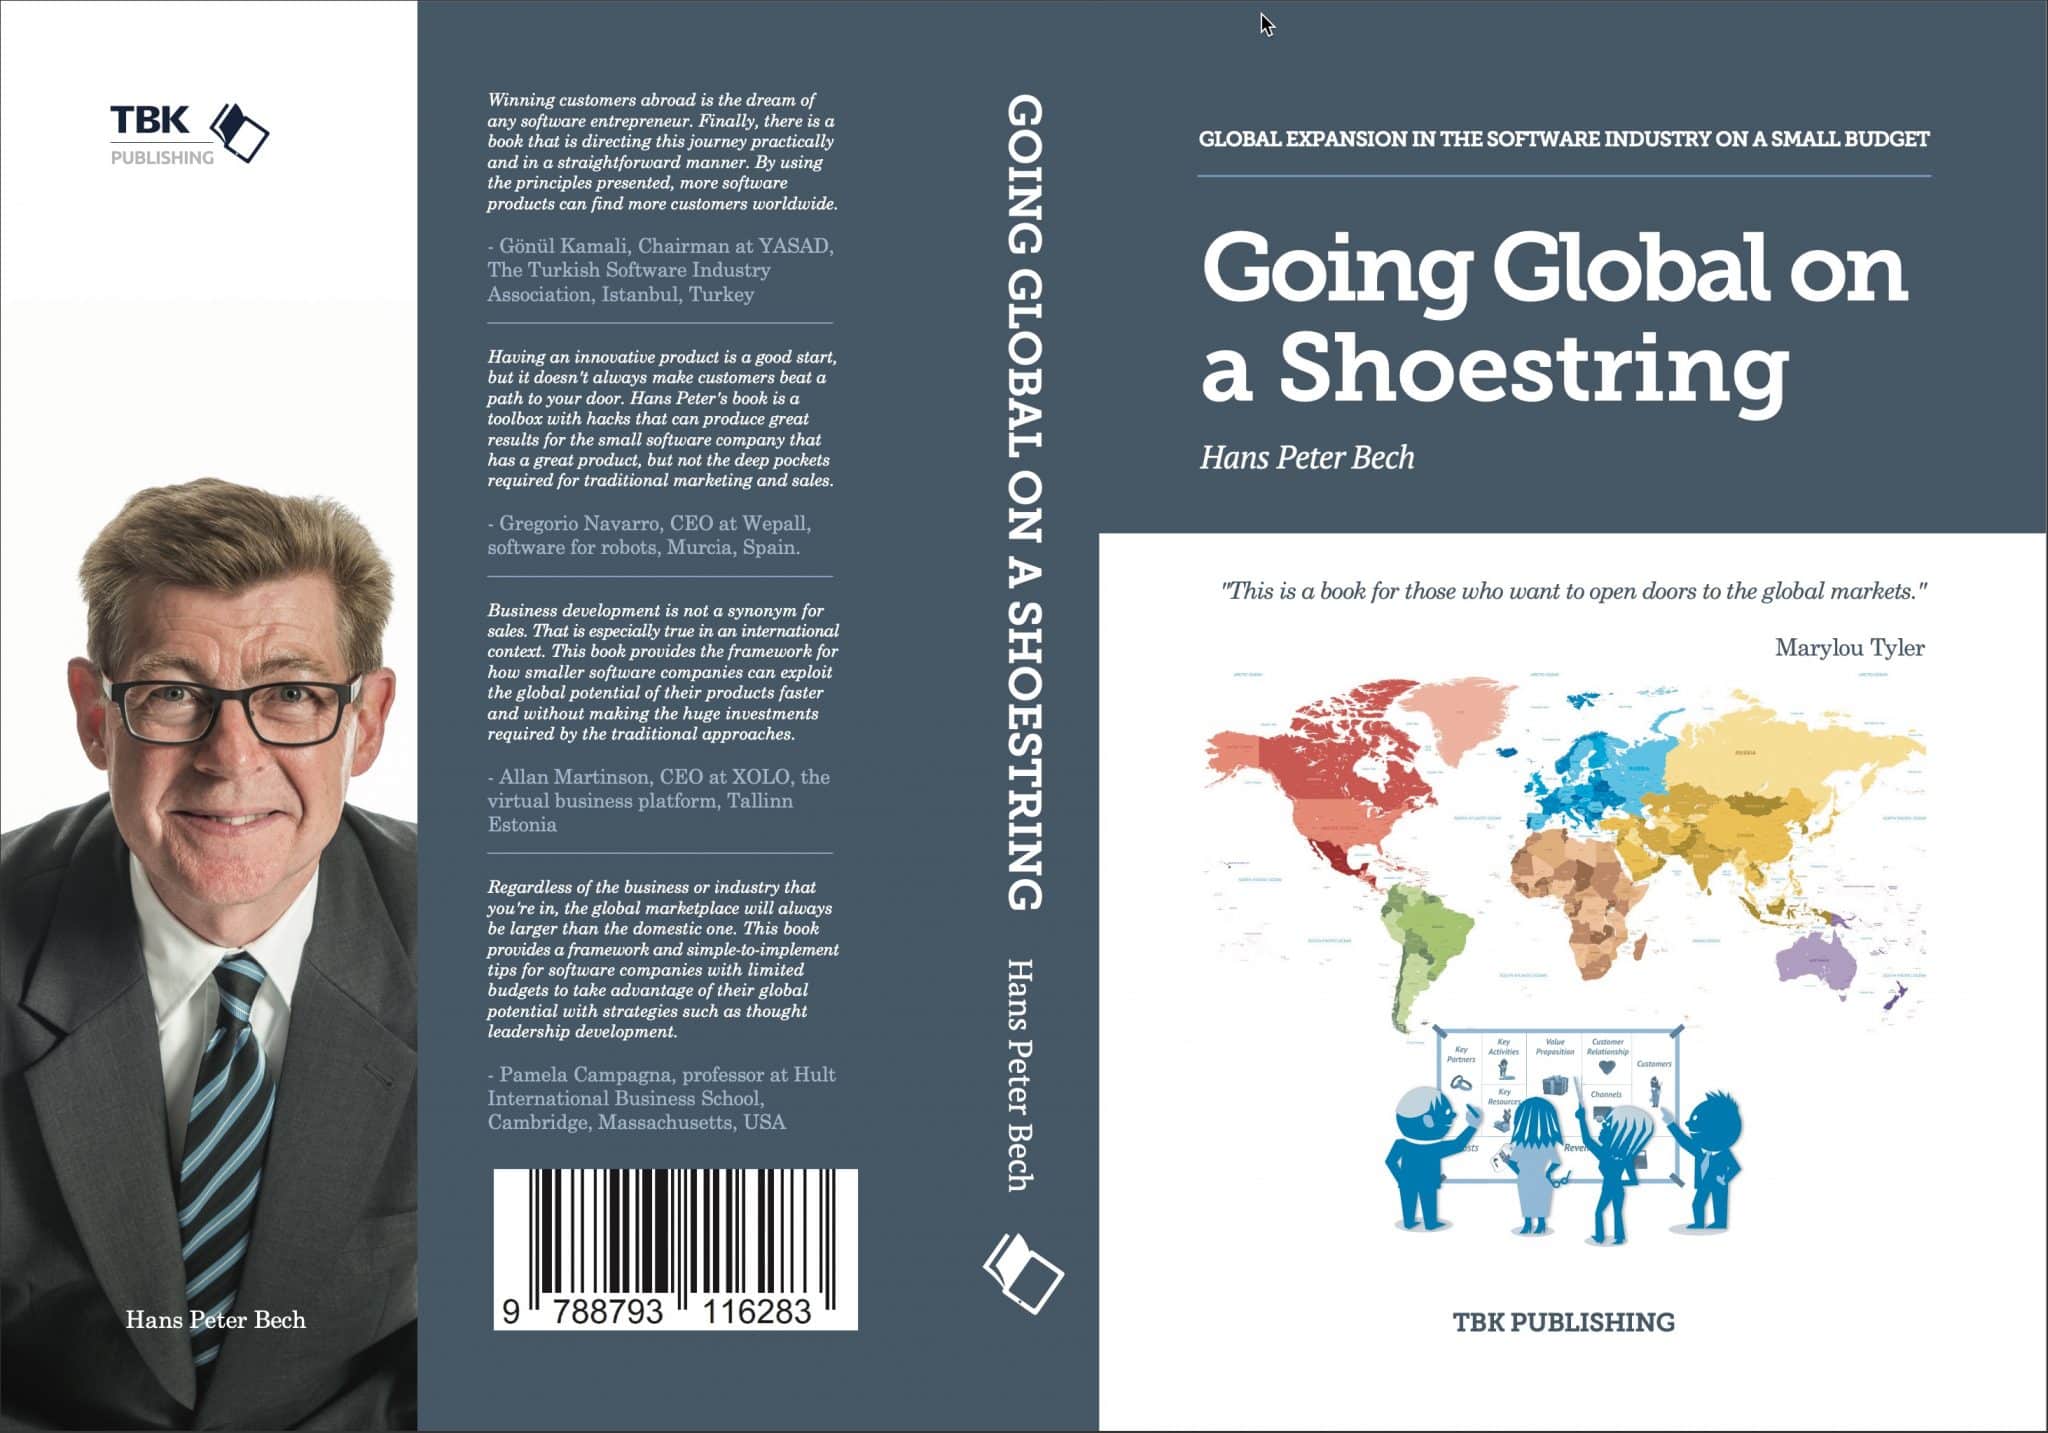
Cover
The title of a textbook should, in my opinion, express the insight that the reader can expect to achieve. That is the book’s value proposition.
The subtitle, which is always significantly longer, should elaborate on the topic and emphasize the relevance to the target audience. I rarely alter the title while writing the book, but the subtitle can change a lot.
At the top of the white area, my books have a short recommendation. In the books Building Successful Partner Channels and Going Global on a Shoestring, I have selected excerpts from the book’s preface, written by industry celebrities (Preben Damgaard and Marylou Tyler, respectively).
The illustration on the cover should support the headline. I think the illustration on Building Successful Partner Channels is too generic, but since the book has sold and continues to sell well, it does not seem to matter.
I have chosen to print the publisher’s name at the bottom of the cover. It is a matter of preference whether you as a self-publisher need to do that.
The Spine
I have chosen to write the title and author name from top to bottom, which is the standard in the US, UK, Benelux, and Scandinavia.
At the bottom of the back, we have placed the publisher’s logo.
The Back of the Cover
As most of my books are sold through web portals, the back of the cover is not very important. Nevertheless, I have chosen to spend time on it.
Before the book is published, I will send the manuscript to four people in the target group and ask if they will write a short statement to be printed on the book’s cover. So far no one has declined. In the eBook editions, which do not have a back cover, the reviews are brought to the front of the book, so that they can be read in the preview that I allow distributors to use on their portals. I will write much more about reviews when I discuss marketing.
It was my graphic designer who suggested including a picture of me on the back of the cover. I think it is a good idea for the reader to see a picture of the author. It personalizes the book.
The book must have a barcode representing the ISBN. Numerous websites offer a barcode generator. If you use Amazon KDP, you can also choose to upload the cover without the barcode, after which they insert it.
In Denmark ISBNs are available here: https://www.isbn.dk. I assume other countries have similar services.
Illustrations
So far, all my books have had illustrations and they are made by freelance graphic designers based on my conceptual ideas. If I use other people’s pictures, I always get approvals and pay for the use. Images are protected by copyright, which you as an author must respect.
I want to use fewer illustrations in the future, solely because it makes the production of the audiobook version difficult. You cannot expect the listener to have the illustrations at hand and explaining an illustration in words is not easy. The audiobook is a good alternative to reading, but in the textbook area, it has several disadvantages, which I will return to later.
Images and illustrations (graphic elements) must have a resolution of 300 DPI but should not be larger for the sake of the file size of the eBook editions. When graphic elements are made in the formats required for the printed book, they can be reused for the digital editions. Avoid small graphic elements with text around them. It does not work well for the digital versions.
Pagination and design
Pagination and design only apply to the printed version of a book. You can do it yourself using e.g., Microsoft Word or Apple Pages. Amazon-KDP has a detailed guide for both and provides templates. Word and Pages are well integrated with for example Endnote (citations), just as there are tools for compiling indexes and table of contents.
So far, I have chosen to let a graphic designer do the pagination and design for my books. When the script is done, I compile it to Word, which the graphic designer imports to InDesign. When she is done, I will get a PDF version in which I can make corrections. It is not uncommon for us to have five to six iterations before we are through.
In my next book project, I will paginate the script myself by following the Amazon-KPD instructions and by using Amazon’s new Kindle Create app.
When the layout of the book is completed, it must be saved in a PDF format that matches the specifications of the printing company. That part is done by the graphic designer, but the instructions from KDP, IngramSpark and Lasertryk are so detailed that you can do it yourself. If you have any questions, you can always ask them. I only have good experiences with the support they provide.
The cover and the content are always uploaded separately. Amazon KDP and IngramSaprk have apps that electronically show what the printed book will look like.
In general, I would recommend any self-publisher to study the authoring tools of Amazon-KPD thoroughly. There are plenty of articles and videos that enable anyone to understand and execute the production of both printed and digital books.
Printing
I use print-on-demand (POD) for all my English books. It is a little more expensive than printing a batch of e.g., 1,000 copies at a time, but it completely removes the investment in a stock and the risk of having unsold books.
The printing price for a 250 paged b/w book is $ 3.85. If I charge $ 19.99 in retail, the royalty is $ 8.15. Each of the three print shops I use provide a price calculator.
For the Danish market, I print 100 copies at a time and send them to DBK who are responsible for the distribution in Denmark. A lot of books are sold directly, and they are either sent from DBK or the printing house directly. It is not worth the trouble to handle packing and shipping myself – I have tried it. When I sell directly, the customer pays for the shipping.
If you would like to see what your book looks like in a printed version, you can order individual copies from the three print shops.
An insignificant advantage of POD is that you can correct errors in the manuscript even after the book is officially published. You can just upload a new print file.
Conversion to digital formats
One of the benefits of using Scrivener is that you can compile directly to the MOBI- and ePub formats. There are apps to check that the formats are correctly compiled and apps where you can simulate what the books will look like in the different eBook readers.
Recording audiobooks
I have published Building Successful Partner Channels as an audiobook and was responsible for the entire process.

I could have chosen to pay for the audio production, but since I have a good speaker’s voice and wanted to learn how to do it, I have set up a small sound studio at home. There are lots of instructional videos on the web that provide guidance on what equipment and setup are required, how to talk, how to post-process the audio files, how to prepare them for upload, and how to publish them.
After recording Building Successful Partner Channels, I understood that the audio version should already be considered when writing the book. Audiobooks make the most sense for novels, where the narrative is sequential, where there is no index, and where significant footnotes, references, and illustrations are not used. If you want to invest in an audiobook version (because you expect a sale), then the book should be written without such features.
Pure textbooks are the easiest to publish as audiobooks.
If you have a good reading voice, you can record the book yourself, but it is a good idea to practice a little first. The longer passages you can record correctly, the less editing is required. Editing includes correcting errors, shortening pauses, removing excessive breathing and smacking sounds, and merging paragraphs into entire chapters. The technical post-processing includes removing background noise, manipulating the sound so that it is within the stated specifications as well as inserting a second of silence at the beginning and 3 seconds at the end of each file.
Editing and post-processing
I use the program Amadeus Pro and record with an Audio-Technica AT202 microphone via USB to my Mac. Audio files are stored directly to an external SSD drive via USB-C. There are several warnings against this setup because there is a risk that the computer’s fan starts and therefore disturbs the recording. I have not experienced it yet, maybe because Amadeus Pro is the only program that runs while I am recording.
The microphone is mounted on an architect lamp arm, suspended from a shock-absorbing device, and supplied with a pop-up filter. When I speak, there must be absolute silence and the room should preferably be completely anechoic. Luckily, I have a music room, where I can hang blankets around me during the recording. I am reading from the manuscript on my iPad, which I have mounted on a tripod.
When I make a mistake, I clap my hands once and read the passage again. The clap forms a clear spike in the audio file, so you can quickly find what to cut away when editing.
I have chosen to distribute my English audiobooks through Author’s Republic, which is a wholesaler. They handle the redistribution to all the audiobook portals including Amazon. Author’s Republic requires you to fill out a W-8BEN (for individuals) or W-8BEN-E (for companies) tax form, which allows them to pay me without having to charge withholding tax in the U.S. It is an intimidating form, but I have filled it out many times when I have had US clients. There are also several YouTube videos that explain how to do it. In practice, it takes approximately fifteen minutes to get it done.
It takes about two months from the time you upload the audiobook until the first royalty payment enters your PayPal account.
In the next article, I will describe how I distribute the books to readers worldwide.
Tags: bestseller, book production, the publishing industry, self-publisher